How To Auto Hide Reference Images For Modeling In Blender
Unleash Your Creative Genius with MuseMind: Your AI-Powered Content Creation Copilot. Try now! 🚀
Unleashing the Power of Perspective
Hey there, visionary creators! Justin from CGessentials.com here, ready to dive into the mesmerizing world of Blender. Today, we're breaking free from the mundane and exploring a nifty trick that'll transform your modeling experience. Picture this: you're knee-deep in your 3D masterpiece, juggling reference images like a digital Picasso. But, oh no! Those images start hogging the spotlight, blocking your view and cramping your creative style. Fear not, for I bring you the key to unraveling this conundrum.
The Clumsy Tango with Reference Images
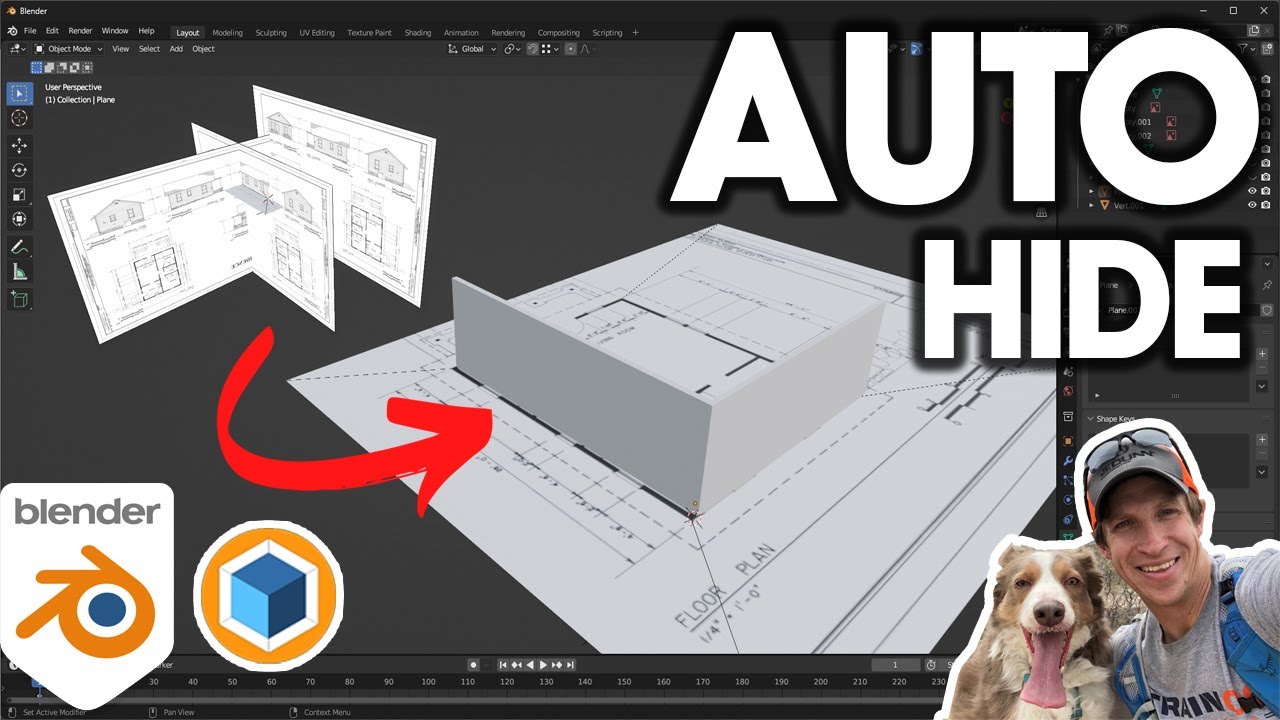
So, you've imported your reference images with the classic Shift+A move, resized them to perfection, and eagerly awaited the magic to unfold. Yet, as you navigate your expansive floor plans, the images play the ultimate game of hide-and-seek, obscuring your artistic vision. But worry not, my friends, for every problem holds the seed of its own solution.
Unveiling the Elevation View Hack
Now, imagine a world where your reference images gracefully step aside when you don't need them and dance back into view at your command. The secret lies in the mystical land of Orthographic View. Grab those reference objects, select them with the finesse of a maestro, and journey with me to the Object Data Properties realm.
The Checkbox Conundrum
Behold the checkbox that holds the key to liberation – "Show in Perspective." Uncheck this magical box, and watch as your reference images gracefully exit stage left when you venture into the realm of perspective. A symphony of visual clarity awaits as you twirl and spin through your 3D canvas, unencumbered by the looming presence of unnecessary images.
Elevate Your Elevation Views
Now, here comes the real magic. As you bask in the glory of your floor plan, dreaming of extrusions and architectural wonders, you can seamlessly transition between perspectives. Tap the keys 1, 3, and 9 like a maestro changing the tempo. Behold as your creation leaps off the screen in the elevation view, allowing you to sculpt heights and depths with unparalleled precision.
A Quick Note for Blender Virtuosos
A word to the wise: if you've dabbled in the arcane art of importing images as planes, this wizardry might elude you. This spell is reserved for the sacred realm of reference images. So, let the meshes stay in their polygonal sanctuaries while you revel in the enchantment of orthographic views.
Architectural Marvels Unleashed
And there you have it, fellow creators! A quick tip that'll revolutionize your architectural escapades in Blender. If you hunger for more wisdom in the art of architectural modeling, I've crafted a playlist just for you. Dive into the world of floor plans, doors, windows, and all things spatially divine.
Join the Creative Conversation
Before I bid adieu, let's keep the conversation alive. Drop a comment below, share your thoughts, and let me know if the mystical realms of Blender still hold secrets for you. Your questions are the sparks that fuel our creative journey.
Until Next Time
As our digital odyssey comes to a close, I extend my gratitude for sharing this creative voyage with me. Stay inspired, keep creating, and I'll catch you in the next video. Thanks, visionary minds!
Related Recaps
- YONEX All England Open 2023 | Anthony Sinisuka Ginting (INA) [3] vs. Anders Antonsen (DEN) | QF
- Mit Zidane als Trainer: So könnte man Mbappé vom PSG-Verbleib überzeugen 🤨 #shorts
- Former Rep. Pat Schroeder, pioneer for women's rights, dies
- 🔴LIVE Multiplayer Trophy Hopping Madness With CJO: theHunter: Call of the Wild
- Cleaning yeezys with fz150 #fz150 #foamzone150 #shoedoc #shoecleaner