Đừng Vứt Bỏ Vì Nó Giúp Cây Lan Không Rễ Phục Hồi Mà Không Héo Lá
Unleash Your Creative Genius with MuseMind: Your AI-Powered Content Creation Copilot. Try now! 🚀
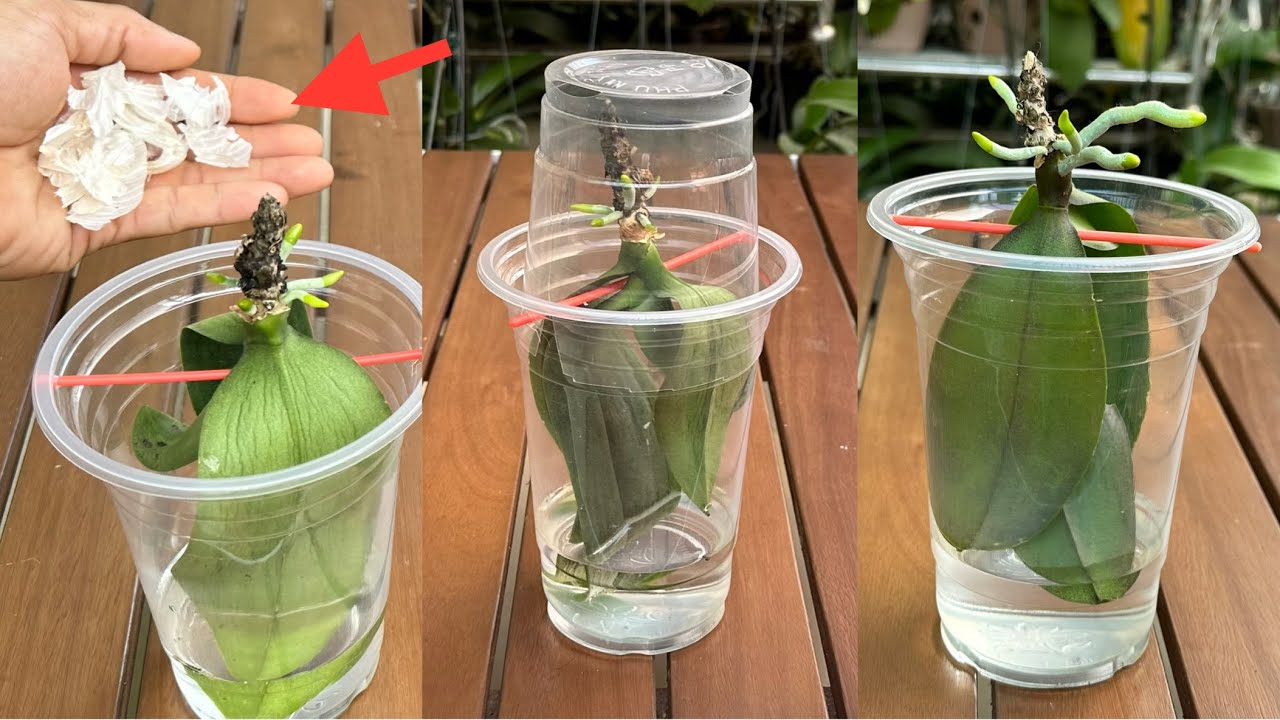
In the realm of plant care, we often find ourselves exploring unconventional, yet remarkably effective methods. Today, I invite you to embark on a botanical adventure, where we'll delve into the art of rejuvenating a small orchid plant and nurturing its roots to a state of robust vitality. But here's the twist – our secret ingredient is garlic! Yes, that humble bulb lurking in your kitchen possesses hidden powers to transform your orchid's growth. So, before you dismiss those garlic peels, let's embark on this botanical odyssey.
Garlic: The Unlikely Elixir
Let's begin with the star of our show – garlic peels. That's right, those seemingly unimportant remnants you usually toss aside contain a treasure trove of vitamins and nutrients. These, my friends, are the magical elixir that will aid in disinfecting and invigorating your orchid.
So, what's the recipe? It's delightfully simple. Take the peel of a garlic bulb and immerse it in a liter of water. Then, tuck it away in a dark corner for a day. Why no water for the orchids, you ask? Watering them would be akin to laying out the welcome mat for bacteria and fungi. Hence, it's crucial to wash the peels thoroughly. After a day in seclusion, the water is now brimming with vitamins and nutrients, ready to play its role in safeguarding those precious orchid leaves from the clutches of fungi and bacteria.
Garlic Juice: A Root's Best Friend
Garlic's charm doesn't stop with the peels. Prepare yourself for the next act: garlic juice. This golden elixir is about to work wonders on your orchid's roots.
Here's the drill: apply garlic juice generously to the roots and allow it to work its magic for 30 minutes. To facilitate the process, create two glasses with well-ventilated lids. This ingenious setup ensures that pesky insects won't meddle with your plant. Once the roots are fortified, it's time to adjust the watering routine. Remember, orchids thrive on moderation – don't drench them. Should the water turn murky, swap it out for fresh water. Then, find a dry and cool spot for your orchid, away from the harsh elements.
Orchid Oasis: Misty Moments
Your botanical journey doesn't end there. It's essential to keep the base of the tree moist, and for this, a regular misting ritual is in order. This misty embrace will help your orchid retain the ideal level of moisture, ensuring it remains in peak health.
Now, after a month of this unique treatment, your orchid will begin to flaunt its healthy roots. Those once-feeble leaves will be strutting their stuff with newfound vigor. Keep up with the misting schedule every two days and position your orchid in a single location to encourage those roots to flourish.
The Grand Finale: Orchid Rebirth
Two months into this journey, you may notice a natural occurrence – some leaves turning yellow or drying up. Worry not, for it's all part of the rejuvenation process. Your orchid, once ailing, is now the epitome of strength and health. With fresh leaves gracing its crown, it's time to transplant your botanical companion.
As you repot your orchid and admire its newfound vitality, consider sharing your experience with the world. Create subtitles in various languages so that others can benefit from this unconventional yet magnificent journey. Don't forget to spread the word, like, share, subscribe, and ring that notification bell for more exciting botanical adventures. Until we meet again, may your orchids bloom with unparalleled brilliance. Good luck on your journey to orchid mastery!
Related Recaps
- Big Chocolate: US Supreme Court to weigh in on child slavery lawsuit against Nestle, Cargill
- trying to dunk on 9 1/2
- PUBG MOBİLE- 1 vs 4 GÜZEL BİTİRİŞ...ARKADAŞLAR BEĞENİP ABONE OLURSANIZ ÇOK SEVİNİRİM...
- Dustin Moskovitz (Asana; Facebook) and Katie Benner (NYT) at Startup Grind Global 2016
- FREE SKIN for EVERYONE!