This May Be The Best Thing I'Ve Ever Done!! Incubating Our First Eggs
Unleash Your Creative Genius with MuseMind: Your AI-Powered Content Creation Copilot. Try now! 🚀
Let's Get Cracking!
In yesterday's video, I showed you all how I unboxed and set up my brand new incubator. And today, the time has come to turn it on and start the incubation process! I can feel the anticipation building as I press the power button. Yes, it's alive!
This incubator comes already preset for chicken eggs, so there's no need for me to mess around with any settings. However, there is one important step I need to take before I place the eggs inside. I need to fill up the humidity tray with warm water. Just a word of advice, you don't want the water to be cool - that won't make the eggs very happy.
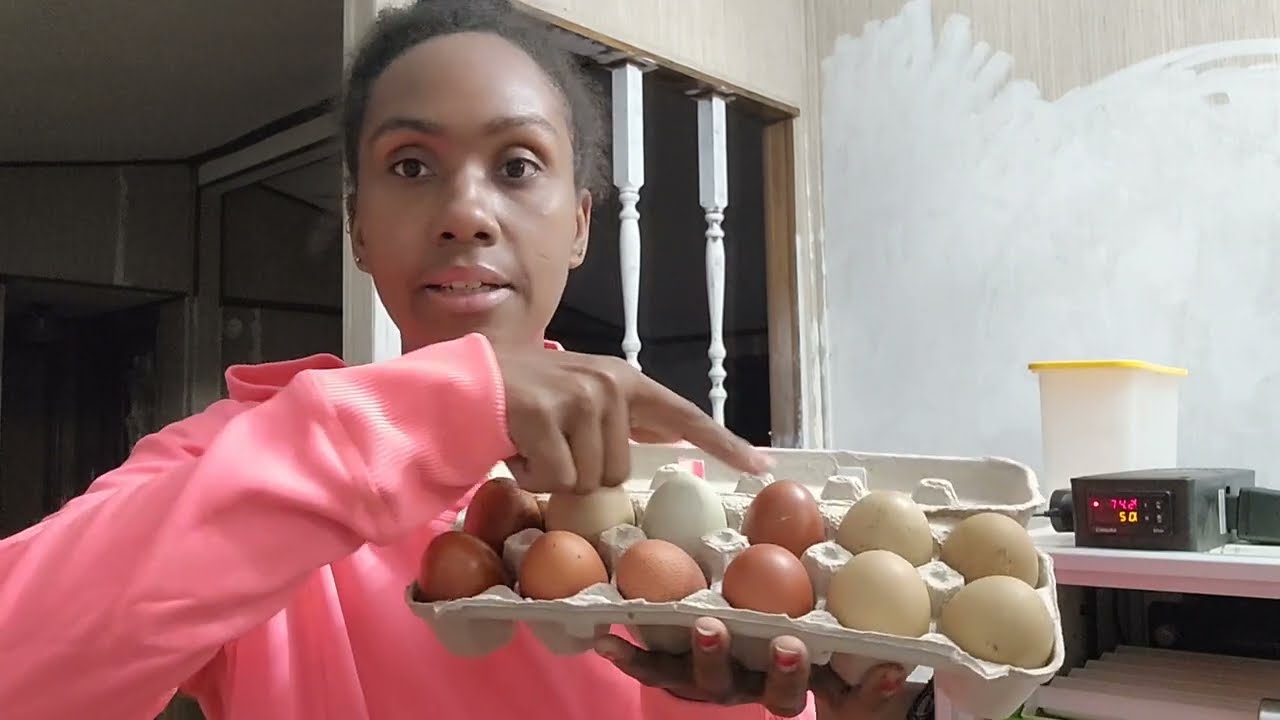
Now that I have my warm water ready, it's time to introduce you to the stars of this incubation show - my very own eggs! I have a variety of colors and shades, ranging from dark brown to moss green. Some are speckled, while others have a lighter green hue. I love the diversity in the eggs from my flock.
The Mystery of Rooster Genetics
Speaking of my flock, let me introduce you to the roosters. I have a copper Marans rooster and a rooster that lays a lighter brown egg. The rest of the roosters were gifted to me, so I'm not entirely sure what colors they lay or what breeds they are. It's like a game of chicken roulette! However, I do know I have some American Breeds among them.
To spice things up, I've chosen to incubate a mix of the darker brown eggs and the greenish ones. I can't wait to see the surprises that hatch from this colorful combination. It's like playing Mother Nature's lottery!
Section 2: Loading the Eggs
Handle With Care
Alright, it's time to load the eggs into the incubator. According to the instructions, I need to place the larger side of the eggs facing up. Simple enough. Let's get crackin'!
[Insert video footage of loading eggs into the incubator]
Oops, I dropped one! Don't worry, folks, just a little mishap in the process. Good thing eggs are pretty resilient, right? Okay, I've successfully loaded all the eggs into the incubator. Now it's time to let the real magic begin!
Section 3: The Countdown Begins
The Sound of Eggcitement
I can't contain my excitement! Now that the eggs are securely nestled inside the incubator, it's like I have a little treasure chest full of potential life right in my own dining room.
Before the incubation process, I made sure to follow the instructions for pre-incubation. The temperature of the eggs was kept between 50 and 68 degrees Fahrenheit, no problem since our house stays comfortably warm. It's currently around 72 or 73 degrees in here, so we are right on track.
The instructions also advised not to store eggs for more than seven days. Luckily, we collected the eggs just a day before incubation, so no worries there. In fact, the eggs for the Naked Gardeners have been collected for less than six days. We've been right on top of egg collection!
I did read a fun tip in the instructions for turning the eggs during storage. And guess what? I actually flipped the eggs a few times when we took them out of the box, just to make sure they were well-prepared.
Now comes the big question: how long will it take for these eggs to hatch? Well, according to the instructions, it will be a mere 21 days, which is just three weeks! That's nothing compared to the patience required for many other things in life.
The Ideal Environment
To create the ideal environment for our little eggs to develop, the instructions suggest placing the incubator two feet away from any structure or wall, out of direct sunlight, and in a clean, well-ventilated indoor space. Luckily, my dining room perfectly meets these criteria, so the incubator is sitting pretty on a flat surface, two feet away from the wall. The stage is set for our little chicken adventure!
I can't express how thrilled I am to finally have these eggs in the incubator. There's something truly special about being part of the process of bringing new life into the world. And just a friendly reminder, I made sure not to wash these eggs before incubation. Apparently, that's a no-no if you want to incubate eggs successfully.
Section 4: The Inquisitive Journey Ahead
Let There Be Light...and Life!
I do recall reading somewhere that after seven days, I should "candle" the eggs to see if any formations are happening. Unfortunately, the instructions don't mention it, but I'll dive into more research and guide you through it in seven days. So make sure to come back for the next exciting chapter of this adventure!
Oh, the anticipation! The countdown has begun, and we have 21 days ahead filled with suspense, joy, and curiosity. Stay tuned as we embark on this inquisitive journey together. I can already picture the little chicks and the happiness they will bring.
Yay for us and yay for the miracle of life unfolding before our eyes!
[End with a catchy outro or call-to-action]
Related Recaps
- Cows to be fed 'methane blockers' to cut climate emissions | Lates World News | English News | WION
- Huarochirí: hallan cadáver de mujer de 63 años que fue arrastrada por el huaico (1/3)
- CUPRA FIP RISE BORDEAUX - Round of 16
- Jennifer Garner, Ed Helms, Emma Myers & Brady Noon Play Family Sketch | Netflix
- Fuertes lluvias provocaron la caída de cuatro puentes en Cotopaxi | Televistazo | Ecuavisa