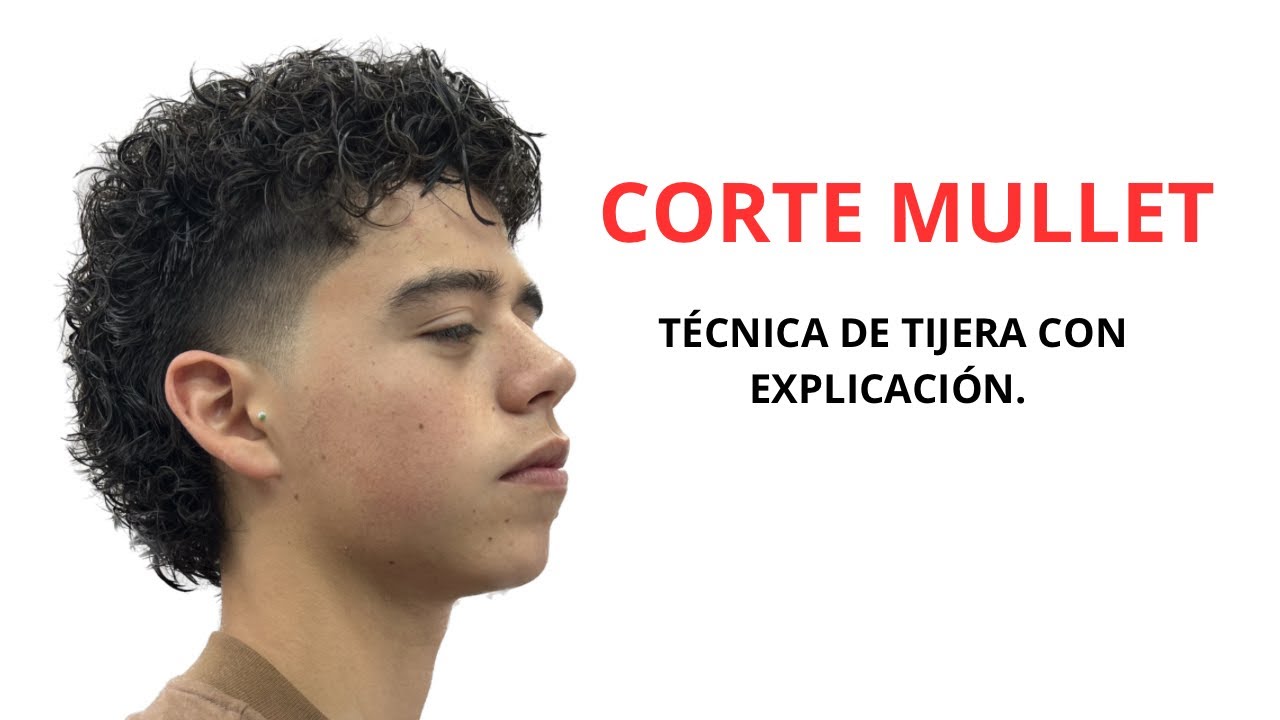
Corte Mullet Después De Un Rizado Permanente - Tecnica De Tijera
Unleash Your Creative Genius with MuseMind: Your AI-Powered Content Creation Copilot. Try now! 🚀
It's time to level up your haircut game with the revolutionary scissor technique! In this video, I'm going to walk you through the step-by-step process of cutting a trendy mullet hairstyle after a perm. Trust me, this technique is a game-changer, so make sure you stick around till the end - there's a lot of exciting content coming your way!
Section 1: Crafting the Perfect Base
Let's start our hair transformation journey in the horseshoe area. This is where the magic happens! Our goal is to create volume at the top, allowing the hair to gracefully flow forward. To achieve this, we'll begin by making a horizontal section.
But wait, we're not stopping there! I want to take it a step further and connect the sides to the top, giving our haircut a unified look. To do this, I'll create a diagonal section that blends seamlessly with the horizontal section.
Now, let's not overlook the importance of precision. Everything we do is calculated and intentional, no room for guesswork here! Take a close look at the guide in front of you. Notice how precise and accurate it is? That's the level of commitment we bring to every snip.
Section 2: Elevating the Art of Layering
Now that we've established our base, it's time to add some layers to create that edgy mullet vibe. But first, let's locate the occipital area and use it as our guide. See those perfectly positioned guides? They're our secret weapon for a flawless haircut.
Alright, let the cutting commence! With confidence, I will trim the hair along these guides, removing any excess length. It's crucial to achieve that tapered effect, going from short to long in a subtle yet striking manner.
Oh, did you notice how the length differs on each side? That's intentional! By strategically cutting the hair in a curved manner, we gain more length on the sides. It's all about creating balance and adding that extra wow factor!
Section 3: Embracing the Power of Angles
Angles, baby! That's what we're diving into now. Our next step is to bring all the hair towards the center, following the path set by our guides. Look at that first guide, serving as a reference point for the rest of the hair.
And guess what? We're not stopping there. We'll keep adding more diagonal sections, maintaining the natural flow of the hair. It's like following a map - we're simply staying true to the path nature intended.
But hold on, don't cut too much! Remember, we're aiming for the minimum amount here. It's all about preserving the structure while adding that perfect touch. I want the hair to embrace its unique natural movement, not lose its essence.
Section 4: The Finishing Touches
Picture this: the haircut is taking shape, the layers are flawlessly blended, and now, we're ready to add the final touches. And how do we achieve that? Well, with the help of our trusty diffuser, of course!
This little tool works wonders. By using the lowest airflow and temperature settings, we ensure that the curls retain their natural bounce and texture. No more lifeless, flat hair here! Just a touch of pressure is enough to style the hair without causing any frizz.
Oh, and did I mention the importance of using the right comb? Size does matter when it comes to styling hair. So, don't be afraid to switch it up and find the perfect comb that suits your needs. It's all about personal preference and getting those curls to cooperate!
Conclusion: Ignite Your Inner Hair Cutting Artist!
And there you have it - the scissor technique that will revolutionize the way you approach haircuts. With precision, creativity, and a dash of humor, we've brought this traditional haircut to a whole new level. It's time to embrace your inner hair cutting artist and experiment with new styles. So, grab those scissors and get ready to transform more than just hair - unleash your creativity and rock that mullet like a true trendsetter!