¡Cuando Vas Al Mecanico! Y Dice Quiero Mas ¡Dinero!
Unleash Your Creative Genius with MuseMind: Your AI-Powered Content Creation Copilot. Try now! 🚀
Introduction
Hey there, friends! Today, we have a fun and exciting project on our hands. We're going to fix an oil leak in a Chevrolet Aveo from 2013. Now, this vehicle is no stranger to oil spills - it's practically covered in the stuff! So let's dive in and get this car back on the road.
Identifying the Problem
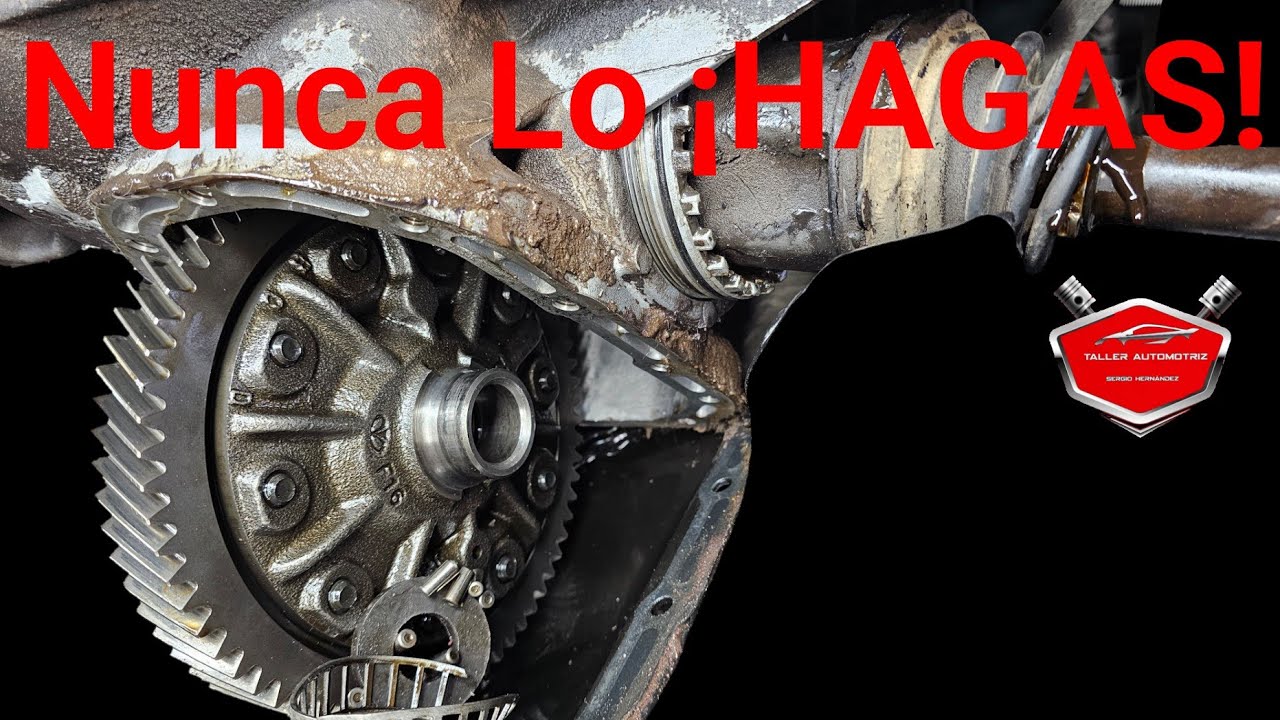
As we take a closer look at the vehicle, it's clear to see that there is a significant oil leak. It's almost as if someone spilled a gallon of oil all over it! This leak is likely caused by a faulty oil seal. But here's the catch - just replacing the seal might not be enough to fix the problem. There seems to be excessive movement in the axle, which could be a result of a worn-out axle or a differential issue.
Tools of the Trade
Now, before we start the repair process, we need to gather our trusty tools. First, we'll need a wrench, preferably a 19mm or 3/4 inch one. To help us remove stubborn parts, we can use a chisel or a specialized tool like the "leg of a goat" (also known as "pata de chivo" in Spanish). This handy tool is great for removing stubborn components without damaging them. And of course, don't forget your safety gear - goggles, gloves, and a sense of adventure!
Getting Our Hands Dirty
Now that we have all our tools ready, let's roll up our sleeves and get to work. Our first step is to remove the axle, which will give us access to the seals. We'll start by loosening the axle nut and removing the cotter pin. If the axle doesn't want to budge, a gentle tap with a hammer or using a tool like a dent puller can help loosen it.
The Battle with the Stubborn Seal
As we remove the axle, we encounter a problem - the seal doesn't want to come out easily. But fear not, my friends! We have a trick up our sleeve. We'll use a chain and a bar to create a makeshift puller and slowly coax the seal out. With a bit of perseverance and creative thinking, we manage to remove the seal successfully!
Uncovering More Troubles
As we inspect the axle, we notice that it's not just the seal causing trouble. There seems to be excessive wear on the axle and the surrounding components. In fact, the axle is so worn out that it's making a lot of noise. This means that in addition to replacing the seal, we'll also need to address the worn-out axle and other damaged parts.
The Budget Boost
Now, I know I promised the customer a repair budget of 500 dollars initially, but with the additional work required, we'll have to bump up the budget to around 1000 dollars. Remember, my friends, sometimes a simple repair job can lead to unexpected surprises. But hey, it's all part of the job - the joys and woes of being an auto repair wizard!
Taking It Apart - Step by Step
With the budget increase approved, we move forward to dismantle the differential, removing all the screws and the oil pan. This will give us the access we need to replace the seals and rectify the worn-out axle. While working on the differential, we notice the presence of some loose screws. But don't worry, my friends, a little tightening here and there will do the trick and ensure smooth operation.
A Well-Deserved Break
Now that we've disassembled everything, it's time for a well-deserved break. We clean all the components thoroughly and wait for the replacement parts to arrive. Sometimes, a repair job can lead to unexpected delays, but patience is a virtue, my friends. And while we wait, we can take this time to marvel at our handy work and reflect on the nature of car repairs.
The Grand Finale
After a day or two, our replacement parts finally arrive, and we're ready to put everything back together. We carefully install the new seals and axle, ensuring everything is in its right place. We tighten all the screws, double-check the fittings, and fill the differential with fresh oil. And just like that, we can proudly say that the oil leak in our Chevrolet Aveo is a thing of the past!
Conclusion
Well, my friends, that concludes our epic journey to fix the oil leak in the Chevrolet Aveo. It was a bumpy ride, but with a little creativity and patience, we managed to conquer the challenge. Remember, in the world of auto repairs, there's always something new to learn, and every project is an adventure waiting to unfold. So, until next time, stay tuned for more exciting car repair stories!
Related Recaps
- Thị trường tăng trưởng ''bất chấp'' FUD BINANCE - Kèo thơm AIRDROP LAYERZERO ???
- Amalia Granata destrozó a Andrea por defender a Jey Mammón
- The Last of Us | Inside the Episode - 8 | Max
- 【Vlog】子5人ママのインフルvlog続編・・インフルエンザweek到来!♫やっぱり家族内感染しました♫ママは発熱なし感染!?つらすぎて小児科でついで受診♫隔離チームは自由で楽しいみたい
- Lãnh đạo Đảng, Nhà nước vào Lăng viếng Chủ tịch Hồ Chí Minh – VNEWS